Intro:
Let me begin by saying I don’t shoot many HDR (High Dynamic Range) images so this little article is written with that in mind. I also have a tendency to skip over most software instructions that don’t have nice photos or a scratch-and-sniff section, so keep that in mind too.
What I do know is that one of the main challenges facing nature photographers is dealing with scenes that have a large dynamic range. Because our pupils and chemistry actively adjust to different conditions, our eyes can see a huge range of illumination (around 20 stops). Unfortunately for us, digital cameras are much more limited with the typical sensor capturing about 9 stops. What does this mean?
Basically, if you’re trying to shoot a scene that has both bright and dark areas, there’s going to be trouble. Either the highlights get washed out and overexposed, or the shadows drop into inky blackness. This isn’t a new problem however, and ever since that “prehistoric” medium called film was used, there have been ways to cope. When I used to shoot medium format slide film, each frame ended up costing me a couple dollars to shoot and develop. With little room for error, I began using a variety of neutral graduated filters to hold back the sky’s brightness and make the contrast range more manageable. These rectangular filters worked well but were a pain to use. With the rise in digital there came better (I think) and easier ways to cope with difficult scenes.
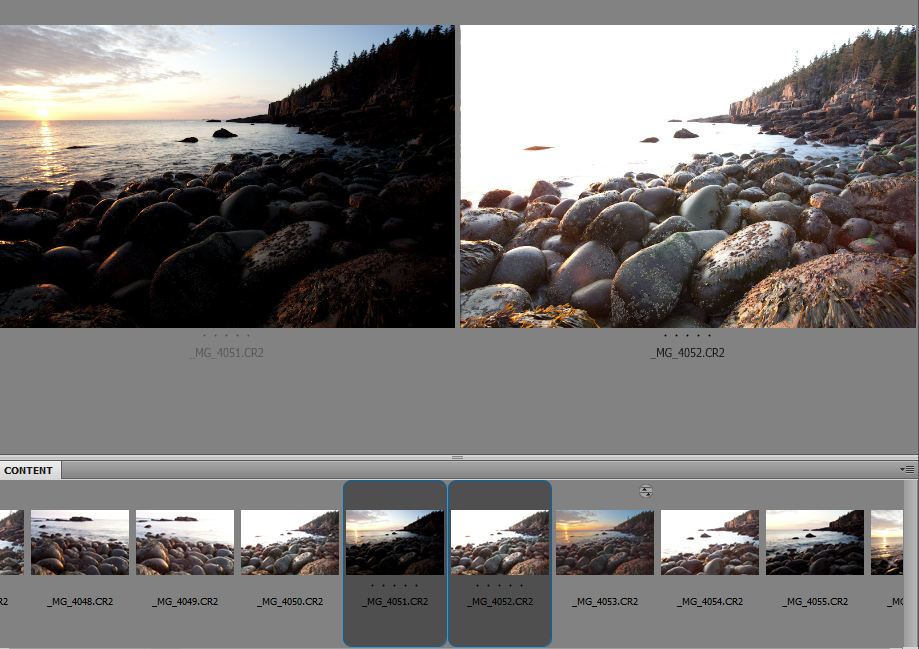
I’m not a photoshop wizard, but I’ve found that by bracketing a tough shot (under and over-exposing), I am able to keep the details in both the sky and foreground. When an image does need help, I bring the underexposed image in as a layer (over the one that was correctly exposed for the foreground) and mask the sky’s details (from the underexposed shot) onto the original photo with the gradient tool. It is a rough and quick way of expanding the displayed contrast range in the final image, and often gives very nice results (similar to using a graduated filter with film).
The one problem with this technique is that it lacks finesse. If the horizon has important elements jutting above it, a tree or mountains for instance, then they too will go dark along with the sky. This is where dedicated programs designed for HDR imaging come in. The slew of new programs out there now are amazingly powerful. They are capable of improving local contrast, merging a large number of different exposures, and creating some remarkable results.
I’m too stupid to use most of them properly.
I did, however, stumble through a few different HDR programs over the course of a boring afternoon to see which software gave the easiest and best results. What follows is not a comprehensive look at all the HDR options or techniques. I’m sure that I’ve forgot to tweak some setting or missed others altogether. Instead, look at this as a comparison for how easy it is for a relative newcomer to open a few exposures and spit out a nice HDR photo.
I actually just bought this program about a week ago, and playing around with the different settings spurred my interest in more complex HDR imaging. From what I’ve seen on the web, Photomatix seems to be the “one” when it comes to increasing the dynamic range of photographs.
Things seem relatively simple to start, just drag some similar photos with different exposures in, and it renders a HDR preview.Clicking on the tone mapping option brings you to the heart of the program where most of the different options hide. This is where I had my first difficulties with Photomatix. Suddenly, I was confronted with a host of new sliders and choices. Some of them looked familiar, some did similar things, and some just confused me.
Here is an example of how it looks:
It’s a confusing but complete set of options, not the easiest thing for a first timer to learn. As you can see, some of the basic settings did give a nice result without too much work. I’ve found that the strength, color saturation, and smoothing options had a big effect on how natural the tone mapped image looked. Unfortunately, Photomatix wasn’t the fastest at rendering previews which was a minor annoyance.
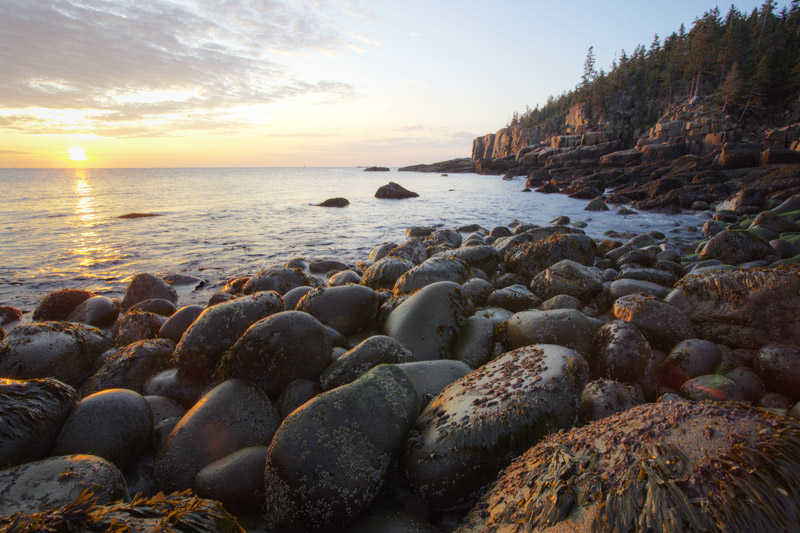
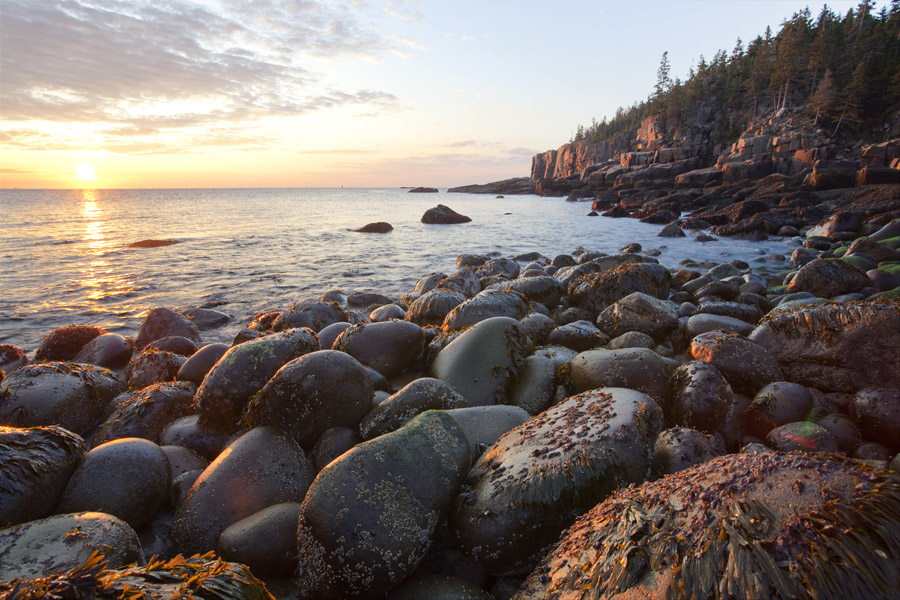
Here is a test image of a subject I typically shoot. You can see how the rising sun and dark rocks, which would be impossible to capture with one exposure, ended up looking nice with only minor adjustments in Photoshop after saving in Photomatix.
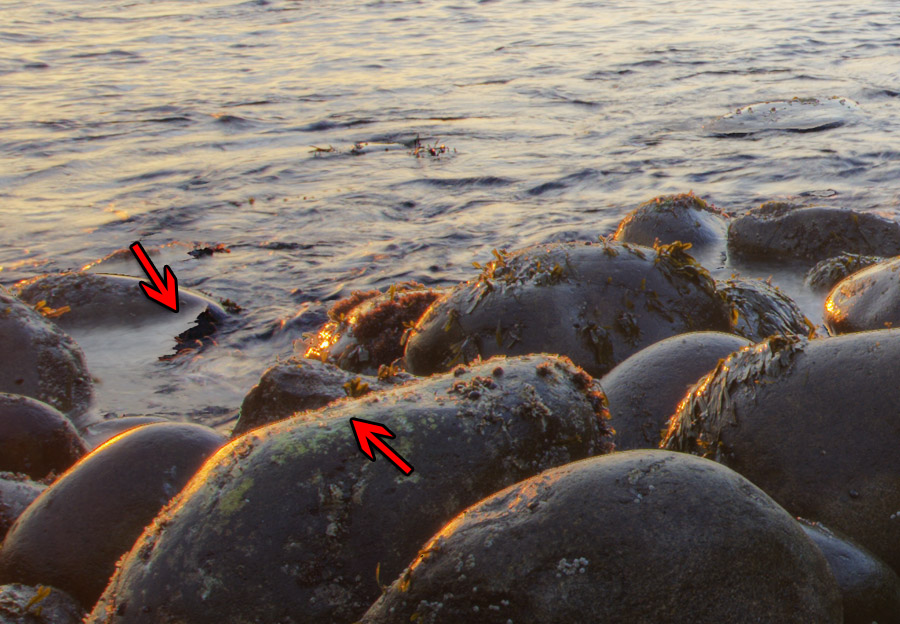
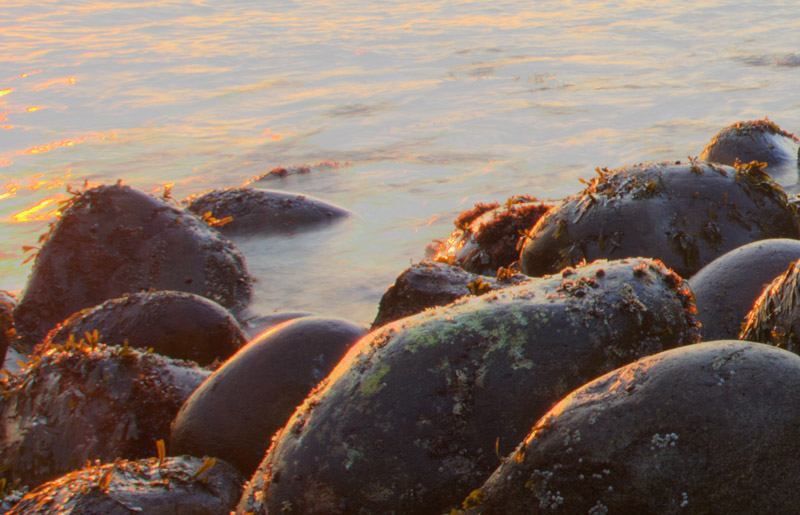
It was only when I zoomed in that I noticed some problems. There was a weird ghosting on some rocks in the water and a nasty bright rim around some objects.
The ghosting was due to the water moving over the rocks between shots and I have a feeling would have been evened out more if I plugged more than two bracketed images into Photomatix. Unfortunately, I didn’t have any other images of this scene so I was stuck with this after my first attempt.
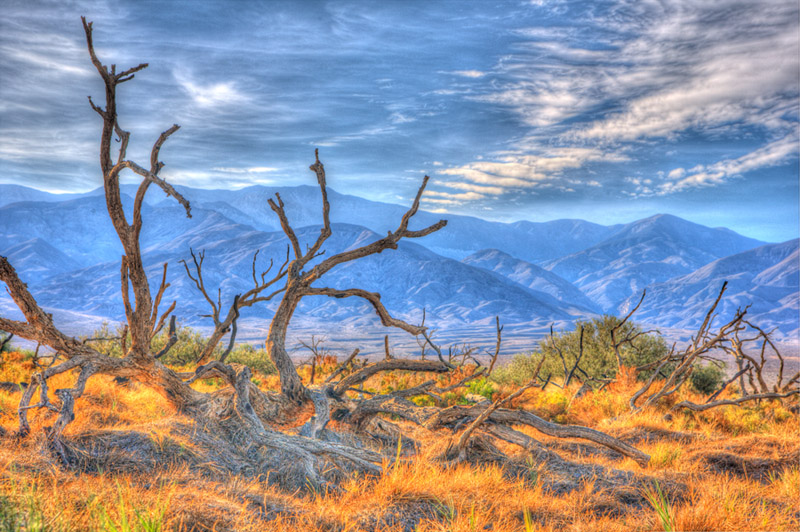
Overall I do like Photomatix. The ability to tweak a range of options would be very useful if you shoot a lot of HDR and got familiar with the work flow. For me, however, it seemed a little unintuitive and slow. There was also some funky image artifacts I couldn’t get rid of. I haven’t given up on Photomatix yet, especially with the LSD/dreamy images it can create, but it did cause me to look into other options.
I gotta say that I’ve always been a big supporter of open source and freely available software. It’s nice for users and promotes more of an unrestricted flow of ideas. Picturenaut is an example of really nice “donationware” that is available free on the HDRlabs.com website (a lot of nice info there too). Before I go further, I did also try the open source program Luminance HDR . I thought the program was very capable, just not polished and somewhat confusing (more for those experienced in HDR).
The first thing that struck me about Picturenaut 3.0 was how simple and quick the interface was. It started similarly to Photomatix, by selecting two (or more) differently exposed images, choosing “standard” response curve (worked best for me), and generating a HDR preview image. The initially HDR image looked usable already, but clicking “dynamic compression” button brought up a new preview and some similar tone-mapping options.
As you can see, the layout is less cluttered than Photomatix and the settings seem a little more logical (at least for me). One really nice thing about Picturenaut, is how quickly it previews any changes (thanks to its multi-threaded architecture) with the ability to rapidly zoom in or out of the image. There are several “methods” you can choose from with each technique having its own set of variables to tweak. I found the Adaptive Logarithmic or Bilateral to give the best results. I also like the ability to adjust the histogram and individual color channels, something I’m familiar with from Photoshop.
I realized after the fact that the water and sky are a little too funky, something easily changed with another attempt (although some may like the surreal look). More importantly, Picturenaut seemed to do a very nice job with blending problems along the water line. There still were some issues, but not nearly as apparent as other programs I tried. The highlights do seem unnatural and featureless though, but that could be the settings I used.
Picturenaut 3.0 is a very capable and very nice (free!) program. It’s quick, does a nice job blending images, and was simple enough for me to muck through it without much pain. It is certainly a good choice for making quick HDR images, but like with Photomatix, I struggle to get the program to do everything I wanted.
Fumbling around with Photoshop:
Photoshop is like an onion. Every time I use it there seems to be another layer of tools and techniques to learn. It is a program that is both amazingly complex and powerful, with an endless variety of ways to get to the same result. I did try Photoshop’s automatic “merge to HDR” and didn’t like it. This is instead a technique my addled brain picked-up from random internet tidbits and a lot of trial and error. It also seems to give me the most intuitive control and the best (natural) looking results. Once I got the hang of it, doing it in photoshop is almost as fast as the other programs.
First I opened the same two raw files used in the other programs.
After bringing up the shadows slightly in the underexposed image, I open both raw files as smart objects (hold shift while opening raw files). I then drag the “darker” (underexposed) smart object onto the “brighter” (overexposed) smart object. Hold shift when you release the layer to keep the images aligned.
After dragging the darker layer over I make a copy of the original brighter layer and move the copy on top of the dark layer. I know it sounds confusing, but basically the dark layer which was exposed for detail in the sky, is sandwiched between two layers exposed for the foreground.
Next click on the top brighter layer and go to Select—>Color Range. Click on the brightest part of the image (usually the sun), turn localized color clusters to on, click invert selection, and a fuzziness around 100-150. After you do all this click on the add layer mask button and Photoshop should create a mask from your selection. At this point if my convoluted instructions haven’t melted your brain, then you’re doing better than me.
This is what the image looks like now (each situation looks a little different initially, the key is getting familiar with the right settings). At this stage the mask is basically revealing the darker sky from the middle layer while keeping the rocks bright and noise-free. If you get to this point and the image looks bad or flat, you can play with the opacity of the top two layers, try to reselect with a different fuzziness for the layer mask, or open the smart objects in raw and adjust exposure there to see what happens. Usually it only takes a few adjustments to get things looking good.
After getting a general image that looks nice, I zoom in to 100 percent, highlight the mask, and turn to the edge refining option. This is the most useful part of this technique since it lets me feather, shrink, expand, or smooth out the mask. Usually, I shrink and feather the selection slightly, doing it a few times or until transition zones and highlighted edges look more natural.
Another nice thing about this technique is the ability to go back into the raw and adjust each layer for chromatic aberrations, a common problem with HDR imaging. It may seem complex but this method worked wonders for me and definitely looks the most natural and intuitive for my way of working.
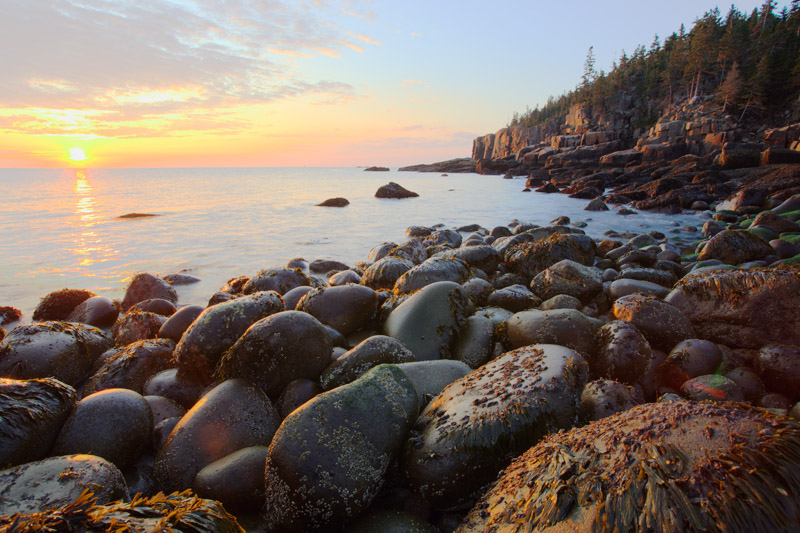
Here is the final result
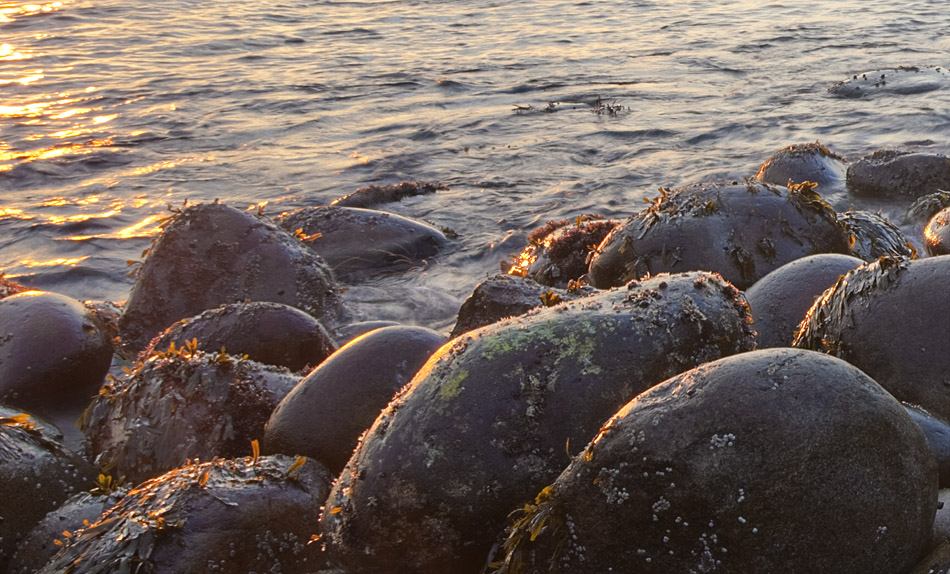
Here is a crop along the water’s edge.
Notice how the highlights look more natural and have detail, the rocks and water look nice and crisp without any ghosting, and the color didn’t go crazy. I’m still refining this technique, but so far it is the only one I’d use for serious work.
Conclusion:
I want to say that each program I tried was impressive in its own way. This little experiment also made me realize just how complex HDR imaging can get and how far we’ve moved from slapping a graduated filter in front of a lens. As in life, there is no one way to make an HDR image, and I hope that this little article takes away a little of the fear and gets people thinking about this unique tool. I know that this is something that can open a wide range of shooting conditions and I will definitely be experimenting with it more in the future.
If anyone has any suggestions or settings on how to use these or other HDR programs, send them my way. I’d love to post a follow up and figure out what I was doing wrong.
Ian

